So along with other 90's trends that have made a come back the Choker Necklace is my favorite. I have seen so many
choker necklaces ranging from
$10-$20 US dollars... What??? Were they that expensive in the 90's? Too expensive in my book so I picked up some items from my local craft store and made my own. This DIY is quick and easy and cost under $10 for two types of chokers.
Supplies needed: Ribbon of choice ( I chose a ribbon with a velvet trim) , Chord of choice ( I chose a soft suede chord) , Metal ribbon crimps, and Charm (if preferred). Scissors, pliers, and Measuring tool.
 |
| First, cut the ribbon to the size wanted. I cut mine to 13.5 in. You should measure it around your neck and take into consideration the size of the metal crimp you are using. Next, fold the ribbon into a point at the end. |
 |
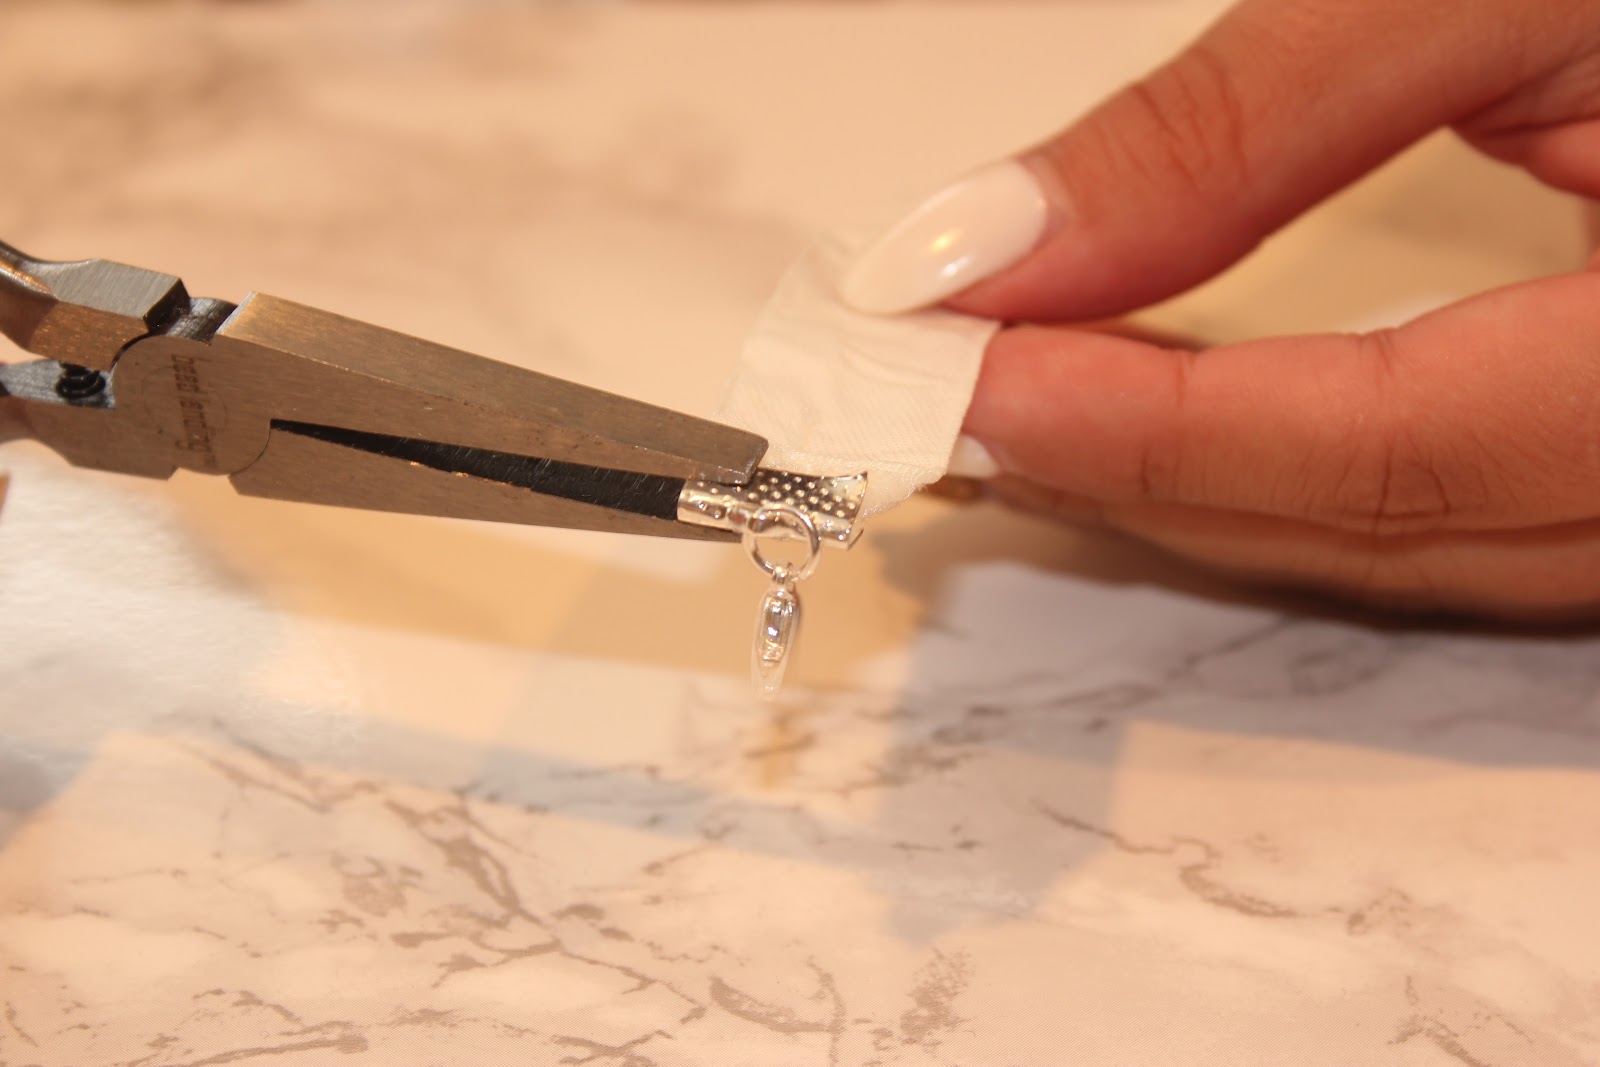
| Lastly, clamp the metal Crimp in place with your pliers. Repeat for other side. |
 |
| And then try on your new Choker.... |
 |
| The next choker is made from a Soft Suede chord. First, measure the chord and cut to preferred size. I used 78" (6.5'). |
 |
| Next, Place ribbon around your neck with one side longer then the other. |
 |
| Then wrap the long side around neck until both sides are even. |
 |
| Lastly, Tie a ribbon to make a cute bow or leave to hang. |
 |
| You can add a charm to the ribbon to personalize if desired. Cute easy and very inexpensive to make.... |


No comments:
Post a Comment